Every new photographer starts their journey with a learning curve. With so many new things like camera gear, camera settings, lighting, composition, timing and more – there’s a lot to take in at first.
Wildlife photography especially can be tough for newbies to navigate! It’s one genre where relying on the default camera settings and automatic modes can only get you so far.
With so many unknowns at work, it’s easy to make mistakes that can haunt you down the road. But understanding the typical pitfalls many new photographers face is the first step to avoiding them! In this article, we’ll explore some of the most common mistakes and how you can remedy them.
Let’s dive into some of the most frequent mistakes and how you can avoid them on your next photography outing.
Table of Contents
Not understanding your camera settings
We wont lie: your camera’s automatic mode can take you pretty far, but not all the way. There are still some situations where the camera might choose the wrong settings, and you’ll want to know how to fix that.
For a crash course on the most important exposure and autofocus settings, check out this article:
Shooting JPEG (vs. RAW)
Most modern cameras give you the option between saving your photographs in JPEG format or in RAW. While JPEG is the default, we recommend switching to RAW as soon as you get photo editing software that can handle the files. Some cameras will even give you the option of saving both files at the same time – a good idea if you plan to get software later.
What’s the difference between JPEG and RAW?
JPEG is the factory default file format used by most cameras. When you take a photo in JPEG, your camera processes the image directly. It may apply different settings for you like white balance, sharpening, extra saturation, etc.
Each brand of camera processes JPEG’s a little differently. This processing is “baked into” the JPEG file and can’t be adjusted later. JPEGs take up less storage space because they are compressed files.
RAW files retain all the unprocessed image data from the camera sensor. They have a .CR2, .NEF or other file extension depending on the brand. They’re essentially “digital negatives” that haven’t been developed yet. They contain more image data than JPEGs.
When you save your images in RAW format, all the processing settings like white balance, exposure, contrast are adjustable after the photo is taken. This allows you to fine tune your images and even rescue details that may have been lost, like dark shadows and blown out highlights.
RAW files are larger in size since they are uncompressed. You will need RAW processing software to view and adjust them, which is the downside to RAW files. Lightroom is probably the most well known processing software. (Darktable is a free alternative.)

RAW files ensure that you can squeeze the most detail you can out of these sub-optimal lighting situations.
Simply put, a JPEG file does not retain the same amount of information that a RAW file does. It also doesn’t give you as much leeway to edit and improve your photos afterwards. If you choose the wrong camera settings and your photos come out too dark, for example, you may not be able to recover the image at all.
Some experienced photographers shoot jpeg because they’re confident they’ll get the settings right in camera. There’s nothing wrong with that! But it makes a lot of sense for newbies to shoot RAW, because you have so much more room to fix your exposure, white balance and more in post processing.
Saving your files at low resolution
It’s also important to make sure you’re using the full resolution of your camera. Many cameras give you the option to save the photos at a small size and low resolution to save space. But there’s really no point in investing in an expensive camera with lots of megapixels if you’re saving the files at low resolution.
The truth is, these days digital storage is pretty cheap. You can always buy a new external hard drive, or subscribe to an online storage service like Google Drive if you run out of space on your computer.
The problem with saving your files too small (a mistake a lot of new photographers to any genre seem to make) is that when you try to print them later, you’ll find that you just don’t have a big enough file to get a good quality print. Many of your early shots will be wasted.
Not organizing your files
When you do wildlife photography, you’ll quickly end up with hundreds and even thousands of photos! Especially if you use burst mode a lot for things like birds in flight, or other fast moving animals.
This is another big reason why we recommend a software like Lightroom or Darktable. Both of these programs offer file organization as well as editing capabilities. You can tag your photos with things like the name of the animal, the location, the lens you used, and so on.
There’s definitely a learning curve, but these programs can save you so much time in organization down the road. Take the time to watch tutorials on YouTube or even buy a course on how these programs work, and you’ll thank yourself later!

Being able to tag images with more than one keyword is a lot handier than just using a folder system.
Under-editing
Many people believe that photos shouldn’t be edited – especially nature photos! After all, they aren’t “natural” anymore if they have tons of filters and effects applied to them.
That is true, but if you’re using a professional level camera, chances are the images that come straight out of your camera do need a little bit of editing – even if you want them to look natural.
Professional cameras aren’t really designed to give you an image that looks exactly how it looked in person. Instead, they do their best to capture the full range of information available to the sensor. That means the files generally look quite “flat” when you first load them onto your computer.
At the very least, most straight-out-of-camera photos need a generous boost to the contrast. Most digital cameras also skew more towards the dark side when they meter the light to protect the highlights from blowing out. If that’s the case for your camera, you’ll want to give your images a nice increase in exposure too.
To make things more complicated, some lighting situations can confuse your camera’s meter. Particularly in very high contrast situations, like a bright sky with a dark subject in the foreground. In these situations, you’ll most likely need to bring the exposure of your subject up in post processing, while balancing out the background.
Editing destructively
Each time you re-edit and re-save a JPEG file, it loses some of its quality. Non-destructive editing adds edits “on top” of the image files – without permanently altering the original data.
When you edit RAW files using programs like Lightroom or Darktable, all edits are saved as separate instructions (usually in an xml file) instead of being permanently written onto the file. The original data stays intact, and edits can be modified or removed any time in the future without damaging the photo.
If you use Photoshop, you can use layers to adjust your files non-destructively, and save the edited image as a PSD file.
If you’re new to photography, you’ll get better and better at editing as you go along! As long as you edit non-destructively, you can always go back later to re-edit your old photos and give them new life.

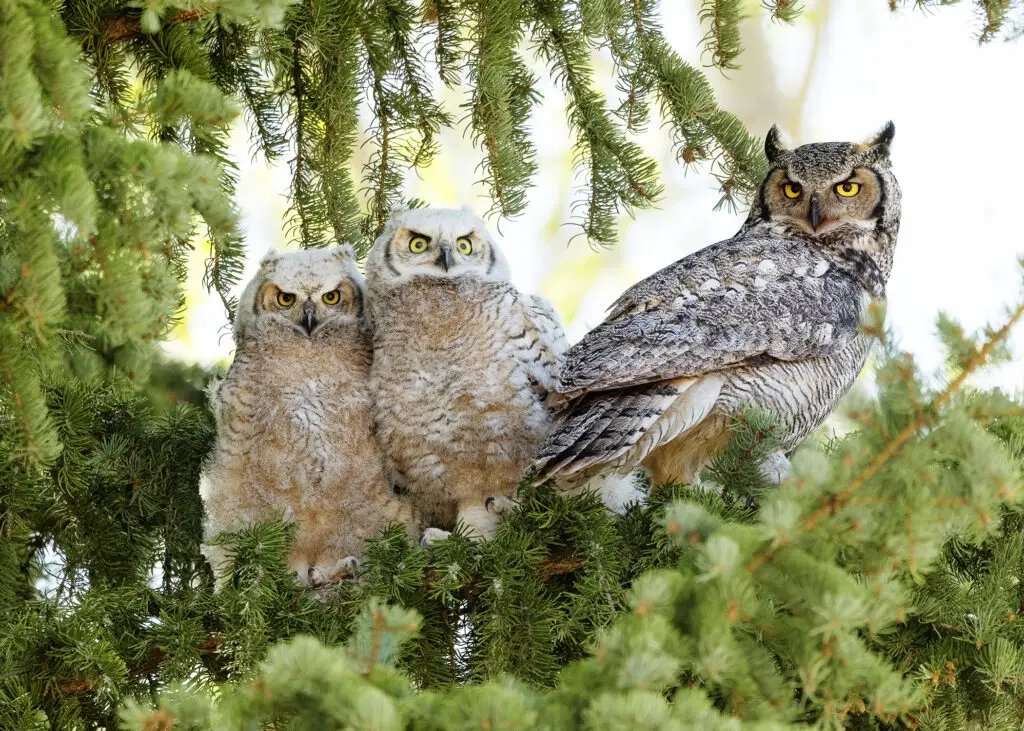
It often requires editing to balance the foreground, subject and background, as was the case for this mother owl and owlets.
Disrupting the wildlife
It’s always a pain to watch people get way too close and generally harass wildlife. This not only spoils the opportunity for other photographers, but it can have disastrous consequences on the animals when they become acclimated to humans. We all know what tends to happen when animals attack people (even if the person provoked it!)
As wildlife photographers, it’s so important that we respect the natural world and the beautiful animals that inhabit it. Please don’t be “that photographer”, and help keep wildlife wild!
Blurry photos
Blurry photos is the #1 most common issue that plagues new and even experienced wildlife photographers. It can be tough to figure out what the problem is, because so many different factors will affect how sharp your photos are.
The most important element to sharp wildlife photos is how much light you have available. It’s easiest to get sharp photos when you have plenty of light, but things get sketchier the darker it is.
If you really want to dive into this topic, we have a whole article just on how to get sharp wildlife photos:
Have fun out there!
We hope this article helped you avoid most of the common pitfalls that new wildlife photographers run into. They’re things you might not notice right away, but can definitely cause you some pain down the line!
If you’d like more photography inspiration, you can check out our nature photography gallery for more wildlife and landscape photos.
Were you guilty of any of these when you first started out? Do you have any tips for new wildlife photographers? Let us know in the comments!
